Phase 3 — Network and storage#
8 lessons · Level: intermediate
This phase covers how a VM gets an address, how you stop one customer from taking the address of another, and where the disks live.
What is in this phase#
| Lesson | What you learn |
|---|---|
| 1 — Network modes: which one, and when | Which of the six modes suits the IPs you were given |
| 2 — Make an IPv4 block and allocate it | Make the block, then attach it to a node |
| 3 — IPv6 blocks and routed blocks | Divide a master subnet, and give each VM a /64 |
| 4 — Set up NAT | Run many VMs behind one public IP |
| 5 — Network filtering | Stop one customer from taking the IP or MAC of another |
| 6 — rDNS and DHCP | PTR records for mail, and the two ways to give a VM its IP |
| 7 — The storage types | Local disk, or shared storage |
| 8 — Hypervisor assets: GPU and CPU pinning | Give one VM a specific device or specific cores |
Lesson 1 — Network modes: which one, and when#
Bro, what is this? Ok so basically: there are six ways to wire up a VM, and you do not pick your favourite. Your provider already picked for you by how they handed you the IPs. MacVTap is the default and usually right. NAT is what you reach for when IPs are expensive.
In plain words#
VirtFusion can give six kinds of network. Your choice depends on how your provider gave you the IPs.
| Mode | How it works | When to use it |
|---|---|---|
| Direct (MacVTap) | The VM sits directly on the physical NIC and gets its own MAC | The default. It is the simplest when the provider routes the IPs to you |
| Bridged | A Linux bridge (br0) joins the VM to the LAN | Older setups, or when the bridge needs special rules |
| Routed | The host acts as a router, with a /32 route for each VM | When the provider filters on MAC |
| NAT | One public IP on the hypervisor, private IPs on the VMs | When IPs cost a lot, or there are few of them |
| Open vSwitch Bridged | An OVS bridge, with VLANs and flow control | Large setups, and isolation by VLAN |
| Isolated | Only the host and the VMs of the group | Internal networks, and tests |
MacVTap is the default from version 1.7.2, and in most cases it needs no extra configuration.
CAUTION: Write down which IP belongs to which node. Providers often tie an IP to one server with an ARP or MAC filter. If you put the IP of one node on a VM of another node, the packets are lost without an error message.
If the interface name is wrong#
Unable to get index for interface eth0: No such deviceThe MacVTap interface name is wrong. Run ip a on the node to see the real name. Then correct it at Hypervisor → Networks → Primary Network → Interface Name.
Lesson 2 — Make an IPv4 block and allocate it#
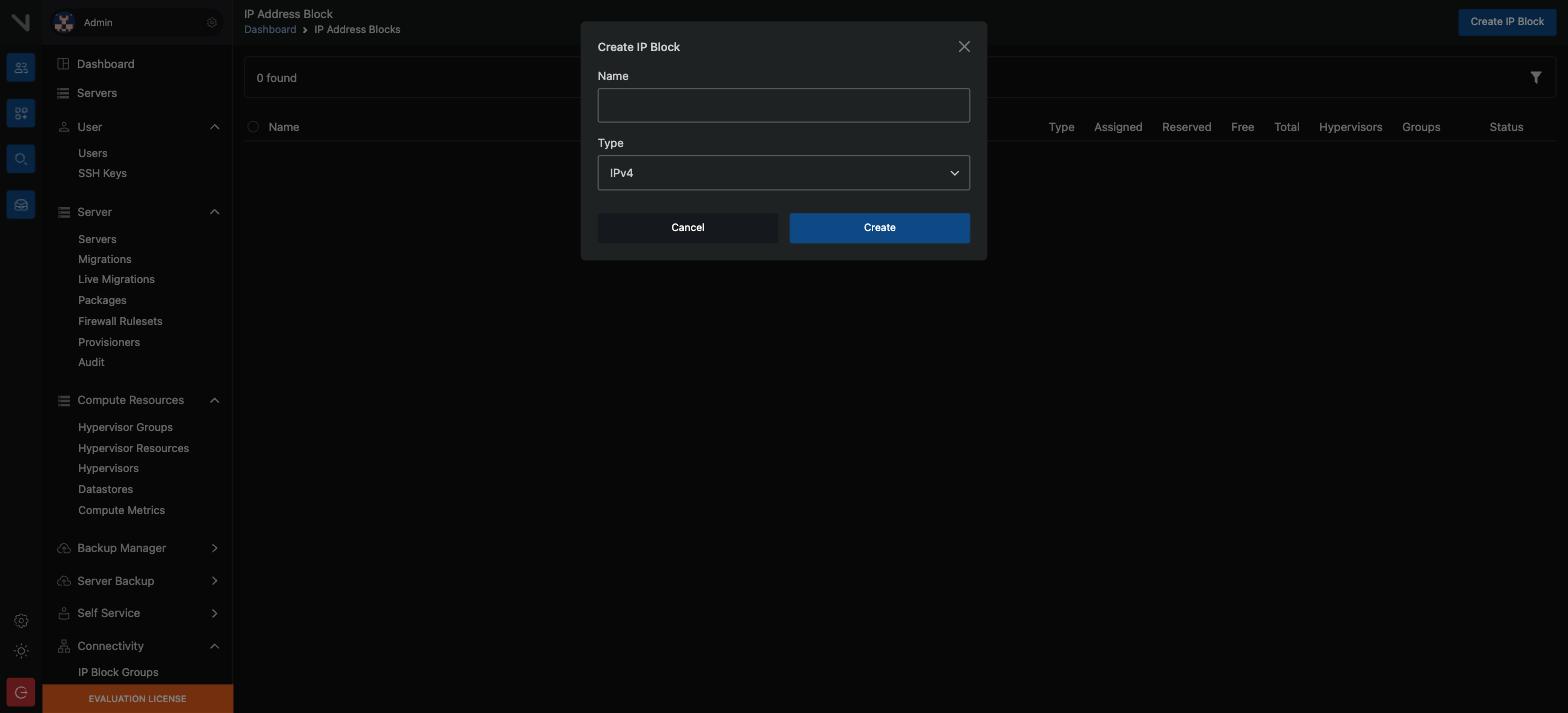
Bro, what is this? Ok so basically: you tell VirtFusion which IPs you own, then you hand that block to a hypervisor. The point is the second half. Skip the assign step and the block just sits there, and every build dies with "no IP available".
Step by step#
- Go to Admin → IP Address Blocks → Create Block and choose the type
IPv4.
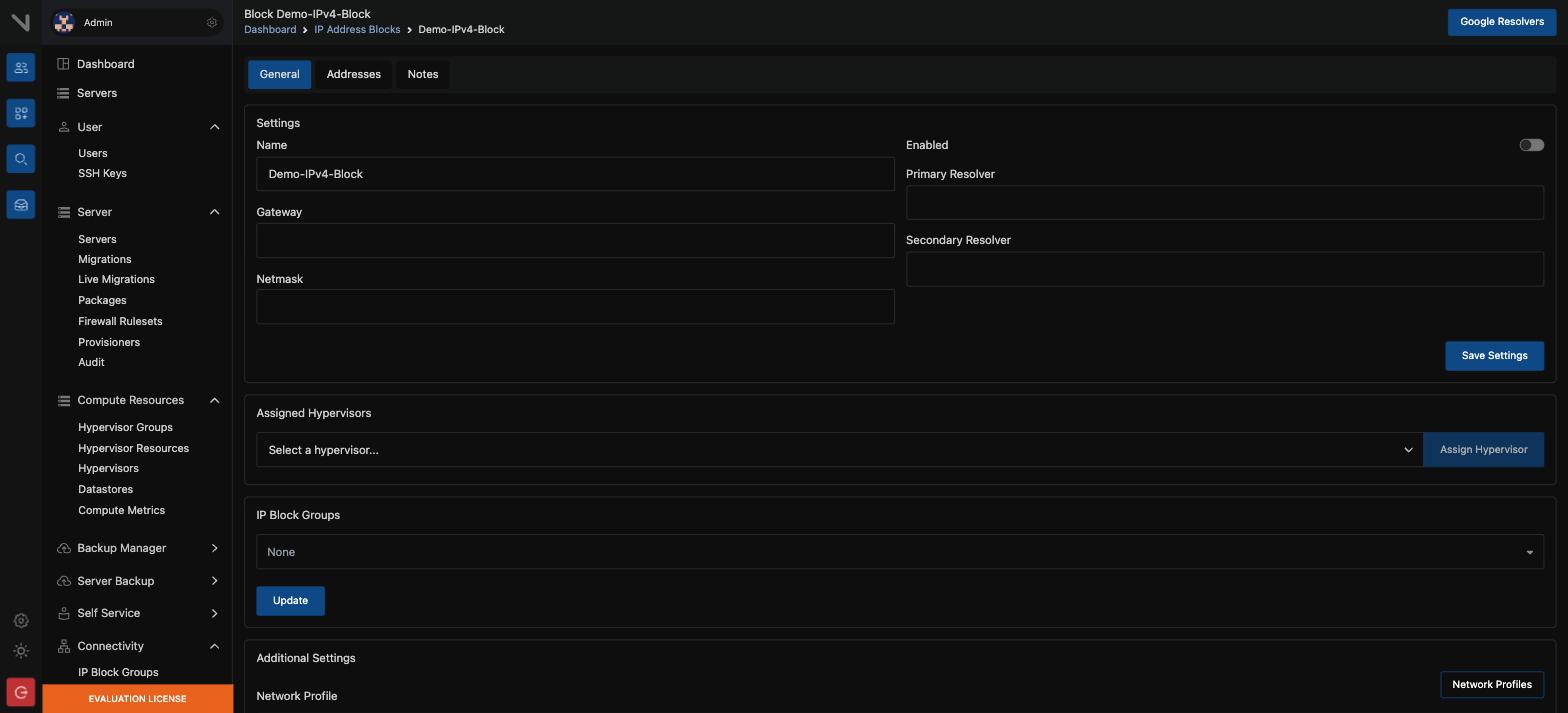
- Give the network details: the subnet, the gateway, and the netmask.
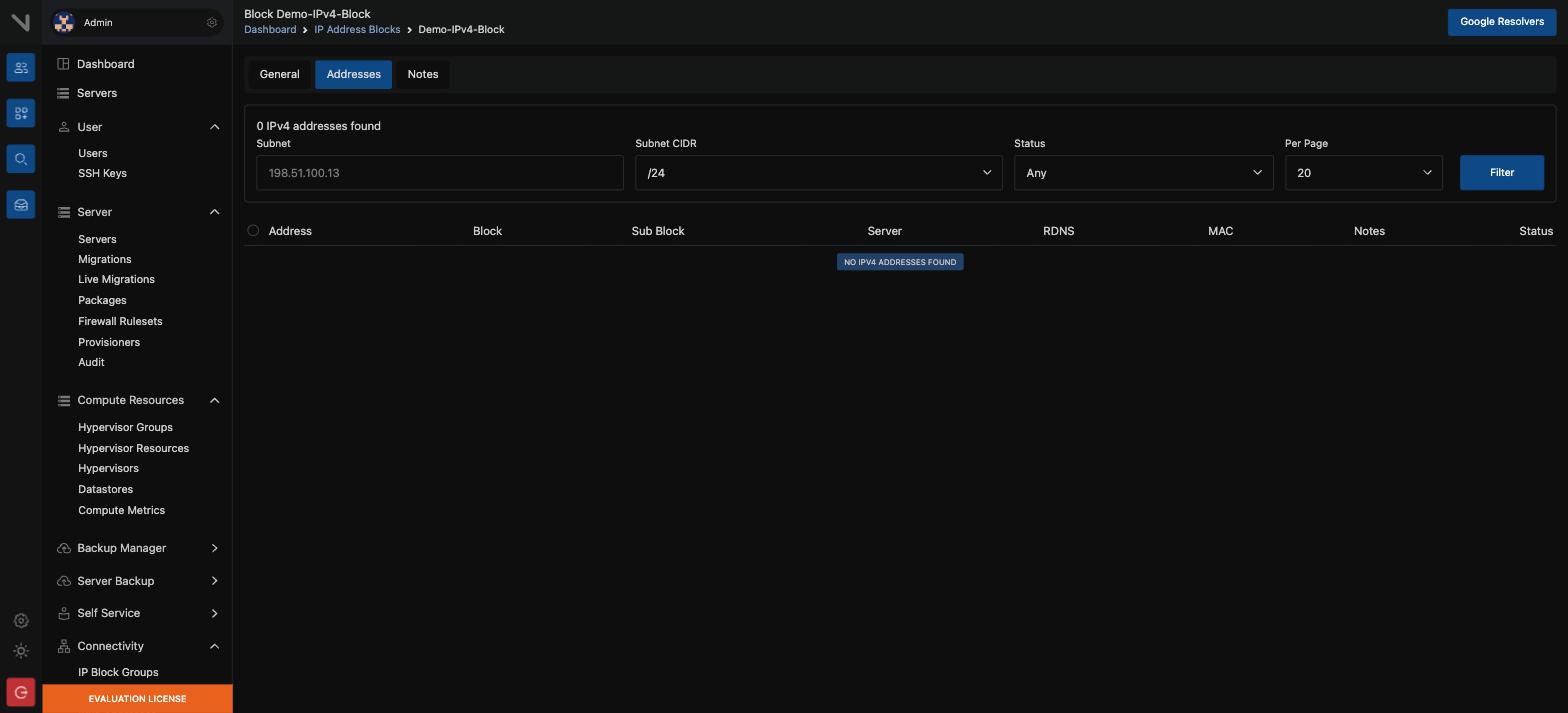
- Add the usable range, with a first IP and a last IP.
- Assign the block to one hypervisor or more.
If you do not assign it, the block does nothing. A server build then fails with "no IP available".
The allocation rules#
- At build time, the server gets the number of IPv4 addresses named in the
package.
- You can add or remove addresses later. The API path is
/servers/{id}/ipv4Qty.
- Keep the gateway, the network address, and the broadcast address outside the
range.
Practical advice#
| Practice | Reason |
|---|---|
| Keep a separate block for each node | It stops an IP from reaching the wrong node |
| Keep some addresses in reserve | Migrations and emergencies need them |
| Put the location in the block name | It is easier to find later |
Lesson 3 — IPv6 blocks and routed blocks#
Bro, what is this? Ok so basically: there is so much IPv6 that each VM normally gets a whole /64 to itself. You give VirtFusion a big subnet, it cuts it into small ones. If a /64 each feels wasteful, routed blocks let you hand out something smaller.
In plain words#
IPv6 addresses are almost without limit, so each VM usually gets a whole subnet.
- Go to Create Block → IPv6.
- Give the master subnet, such as
2001:db8:100::/48. - Divide it into smaller subnets. Usually each VM gets a
/64. - You can blacklist the part you do not use.
- Assign the block to a hypervisor.
Routed blocks#
If you do not want to give a whole /64 to each VM, you can give a smaller subnet. When the provider routes a large block to you, VirtFusion can allocate a /128, a /127, or a /126 subnet inside that block.
cloud-init and IPv6#
On an Ubuntu template you can have to turn router advertisement off. If you do not, the VM takes extra addresses by itself. You can write a netplan file with cloud-init:
# /etc/netplan/99-user-conf.yaml — written by the cloud-init write_files module
network:
  version: 2
  ethernets:
    ens3:
      accept-ra: false
Lesson 4 — Set up NAT#
Bro, what is this? Ok so basically: one public IP on the node, everything else on a private range behind it, and port forwarding to get in from outside. It saves real money when IPs are dear. It also means Dnsmasq and HAProxy on the hypervisor, so it is more moving parts.
In plain words#
NAT means one public IPv4 on the hypervisor, and all the VMs in a private range such as 192.168.200.0/24. Traffic from outside comes in through port forwarding.
When IPs cost a lot, this saves much of that cost.
What you need#
Dnsmasq and HAProxy must be installed on the hypervisor. Then you must make a network XML file that holds the IP range and the main device.
On the VirtFusion side#
- Add that private range as a normal IP block. Leave out
.0,.1, and
.255.
- Set the network type of the hypervisor to NAT v1, with the interface
name natbr0.
IPv6#
A VM behind NAT can still get a native IPv6 address. Name a valid IPv6 address in the network configuration, a /64 where that is possible.
Three limits
- If the control server and the hypervisor are on one machine, NAT does not
work. The proxy ports collide.
- With IPv4 NAT, the VM must use its primary interface.
- A server with a NAT interface cannot be migrated, neither live nor
hybrid.
Lesson 5 — Network filtering#
Bro, what is this? Ok so basically: two customers on one bridge is a knife fight waiting to happen. Without a filter, one of them can claim the other's IP or spoof a MAC and steal the traffic. Turn a filter on. "None" is not an option you should ever pick.
In plain words#
Two customers on one bridge are a risk. One of them can put the IP of the other on their own VM and take the traffic. They can also spoof a MAC address. A filter at the bridge stops this.
| Filter | What it does |
|---|---|
| None | Nothing. Do not use it |
| Libvirt | The standard libvirt filter. It stops MAC spoofing and IP theft |
| Native Standard | The same rules as Libvirt, in the implementation of VirtFusion |
| Native Performance (IPv4) | The fewest rules, IPv4 only. The fastest |
| Native Performance (IPv4 + IPv6) | The fewest rules, and it handles ICMPv6 |
On a new hypervisor the default is Native Performance (IPv4 + IPv6), from version 2.4. An older installation keeps the Libvirt filter, and you must change it by hand.
Apply a filter to servers that exist#
A changed filter reaches new servers only, and servers where some action ran. To apply it to every server at once, run this on the control server:
vfcli-ctrl server:configurations HYPERVISOR_ID --options=networkCustom filters#
Copy the default configuration into /home/vf-data/conf/netfilters/. The JSON file holds the ebtables rules, with a set part and an unset part.
Lesson 6 — rDNS and DHCP#
Bro, what is this? Ok so basically: a customer running a mail server needs rDNS or their mail lands in spam. You can do it by hand every time a ticket arrives, or turn Automation on and let them set the PTR record themselves. The second one kills a whole category of ticket.
Reverse DNS#
A customer who sends mail needs rDNS. VirtFusion gives it in two ways:
| Mode | What it means |
|---|---|
| Manual | The customer asks, and you enter the record by hand |
| Automation | The panel writes the record straight to the DNS provider |
With Automation on, the customer changes the PTR record from the panel. This removes many support tickets.
DHCP on the hypervisor#
Some network designs give the VMs their addresses with DHCP. You must then run a DHCP server (dnsmasq) on the hypervisor. The DHCP guide of VirtFusion shows this setup.
General advice: use static addressing with cloud-init where you can. DHCP adds expired leases, wrong ranges, and the same IP on two servers.
Lesson 7 — The storage types#
Bro, what is this? Ok so basically: by default a VM disk sits on the local disk of the node it runs on. That is fast and simple, and it means a dead node takes its disks with it. Ceph and the rest exist to fix that, and they cost you complexity.
In plain words#
By default a VM disk is on the local disk of the hypervisor, in /home. A larger setup can add shared storage.
| Type | Character | When |
|---|---|---|
| Local (default) | The fastest and the simplest. If the node fails, the disk cannot be reached | Small and medium providers |
| Ceph RBD | Distributed and redundant. Live migration is simple | Large clusters, 3 nodes or more |
| Remote Filesystem | An NFS-type mount | Shared images, and backups |
| StorPool | Commercial high-performance SDS | Enterprise |
| Lightbits | Based on NVMe/TCP | Low latency, large scale |
How to choose#
- If you are starting, start with local NVMe. It has the least complexity
and the most IOPS.
- If a VM must keep running when one node fails, there is no way except
Ceph.
- Ceph adds latency, and it needs a separate network of 10 GbE or more.
CAUTION: Disaster recovery (
vfcli-hv dr:backup) backs up the local disks only. Shared storage such as Ceph is left out. Plan the redundancy and the backup of shared storage separately.
Lesson 8 — Hypervisor assets: GPU and CPU pinning#
Bro, what is this? Ok so basically: this is how you hand a real GPU, a USB device, or specific CPU cores straight through to one VM. Get IOMMU right in the BIOS first, then group the assets and attach the group to a package.
In plain words#
To give a GPU, a USB device, or specific CPU cores straight to one VM, use an "Asset". Assets exist from version 5.1.
The configuration#
Go to Compute Resources → Hypervisors → [node] → Assets.
- Give a name, choose a type such as "Device", and give the XML of the device.
- For GPU passthrough, the IOMMU grouping must be correct first. Turn VT-d or
AMD-Vi on in the BIOS.
- Put the assets into a group, then add the group to a package.
When a package holds an asset group, a free asset is attached at build time. If you build the server through the API, you can override the default group.
The limit#
CAUTION: An asset belongs to one hypervisor. A server that holds an asset cannot be migrated. If you sell GPU VPS, say this limit in the advertisement.
You can show the asset details to the customer, with your own icon. The icon is a PNG of about 250×250 pixels, kept in /opt/virtfusion/app/control/public/custom/img/assets/.
At the end of phase 3 you can#
- Choose the correct network mode
- Make IPv4 and IPv6 blocks, and attach them to a node
- Run more VMs on fewer IPs with NAT
- Stop IP hijacking
- Decide between rDNS modes, and between DHCP and static addressing
- Choose a storage backend
- Understand GPU passthrough and its limit