Phase 2 — Installation#
7 lessons · Level: beginner to intermediate
This phase takes you from empty hardware to a panel that runs, with the first security work done.
What is in this phase#
| Lesson | What you learn |
|---|---|
| 1 — Plan the hardware, the OS, and the partitions | What to decide before you install |
| 2 — Install the control server | One script installs nginx, PHP, MariaDB, Redis, and the application |
| 3 — SSL, domains, and Cloudflare | Replace the self-signed certificate with your own |
| 4 — Install a hypervisor node | One command on each bare-metal node |
| 5 — Commission a hypervisor and set its limits | Add the node, then decide how much of it you sell |
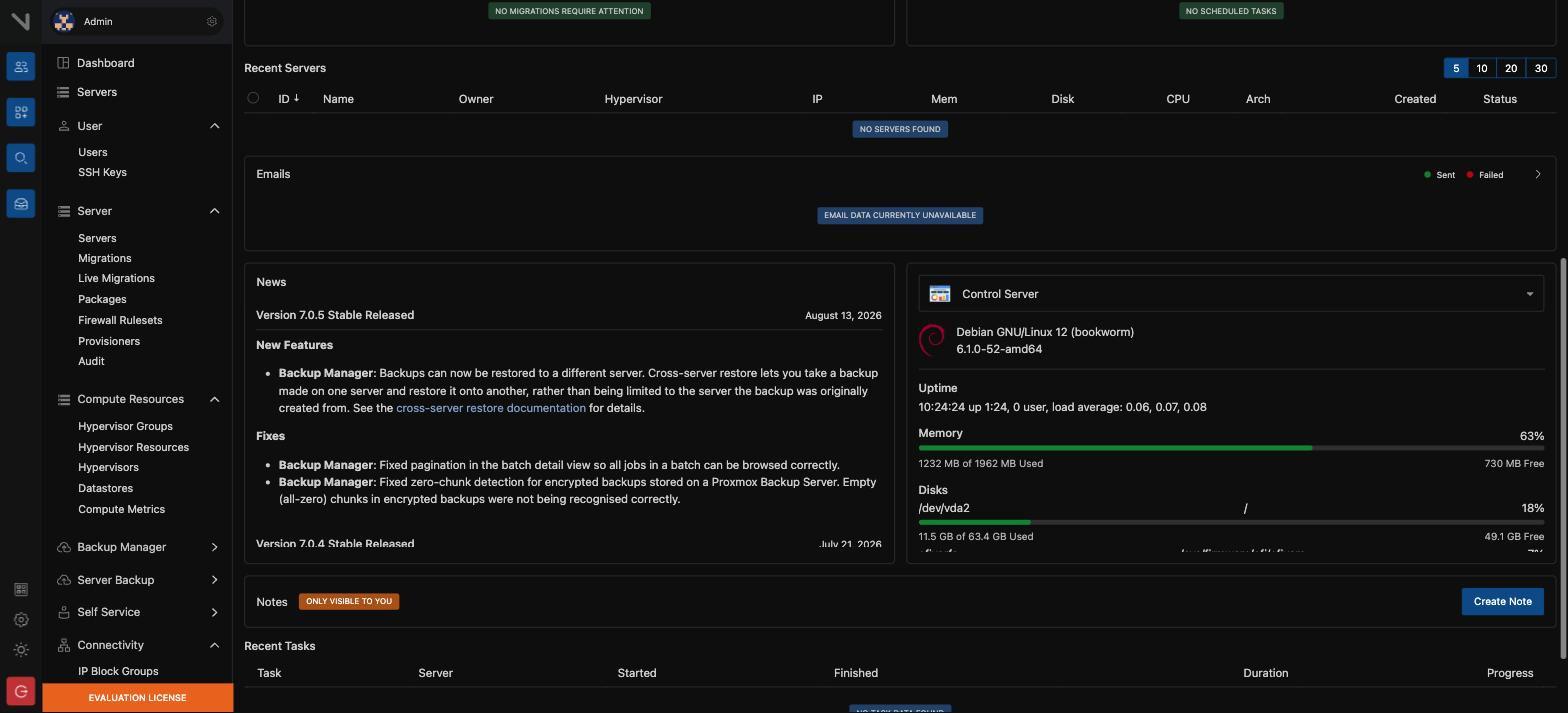
| 6 — The task queue, the services, and updates | Move heavy work to a Redis queue, and keep the software current |
| 7 — Security after the installation | The work to do on the first day |
Lesson 1 — Plan the hardware, the OS, and the partitions#
Bro, what is this? Ok so basically: the control server is small. 2 GB of RAM and 20 GB of disk gets you running, because it never runs a VM. But it is the one box that takes the whole cluster down with it, so back it up. The hypervisor is where the money goes.
The control server#
| Item | Minimum | Advised |
|---|---|---|
| RAM | 2 GB | 4 GB or more |
| Disk | 20 GB | 40 GB, because the logs and the database grow |
| Architecture | x86_64 | x86_64 |
A small VPS is enough. The control server runs no VM, so it does not need a large machine.
But it is the single point of failure. You must keep a backup of it. See phase 4, lesson 9.
Supported OS — the control server (x86_64 only)#
| OS | Condition |
|---|---|
| Debian 12 (Bookworm) | Fully supported |
| Debian 13 (Trixie) | Fully supported |
| Ubuntu 22.04 / 24.04 | Fully supported |
| AlmaLinux 9 / 10 | Fully supported |
| Rocky Linux 9 / 10 | Fully supported |
Supported OS — the hypervisor#
| OS | x86_64 | AArch64 |
|---|---|---|
| Debian 12 / 13 | Yes | Yes |
| AlmaLinux 9 | Yes | No |
| AlmaLinux 10 | Yes | Yes |
| Rocky Linux 9 | Yes | No |
| Rocky Linux 10 | Yes | Yes |
| Ubuntu 22.04 / 24.04 | Yes | No |
| Fedora 44 | For tests only | No |
The documentation gives more attention to Debian-based systems. On a hypervisor, Debian is the preference of VirtFusion.
Partitions — the most common mistake#
By default the VM disks are in /home. Therefore:
- Make
/homethe largest partition. Give it almost the whole disk. - Use the ext4 file system.
- 30 to 50 GB is enough for
/, the root partition.
CAUTION: Set the partitions before you install the OS. The default installer usually gives the whole disk to
/and leaves/homesmall. The space then runs out after a few VMs, and the partitions are hard to change later.
Lesson 2 — Install the control server#
Bro, what is this? Ok so basically: one script installs the lot. But test three things first — enough RAM, a clock that is actually in sync, and ports 80 and 443 open. A stock cloud image usually fails at least one of them, and fixing it afterwards hurts more.
In plain words#
One script does all of it: nginx, PHP, MariaDB, Redis, and the VirtFusion application.
Do these three tests first#
A minimal cloud image usually fails one of these tests. Each failure is easier to correct before the installation than after it.
- Make sure that the machine has 2 GB of RAM or more.
- Make sure that the clock is synchronized. Licence validation fails when
the clock is more than 60 seconds wrong.
- Make sure that the firewall accepts ports 80 and 443.
free -h                     # 2 GB minimum, 4 GB is better
timedatectl                 # "System clock synchronized: yes"
ufw status                  # ports 80 and 443 must be open
If the clock is not synchronized, install a time client:
apt install systemd-timesyncd -y
systemctl enable --now systemd-timesyncd
If UFW is active and allows port 22 only, open the two ports of the panel:
ufw allow 80/tcp
ufw allow 443/tcp
ufw reload
Run the script for your OS#
CAUTION: The name of the Ubuntu script holds a dot, not a dash. The address
install-control-ubuntu-24-04.shgives an error 404.
# Debian 11
apt install curl -y
curl https://install.virtfusion.net/install-control-debian-11.sh | sh -s -- --verbose

# Debian 12
apt install curl -y
curl https://install.virtfusion.net/install-control-debian-12.sh | sh -s -- --verbose

# Debian 13
apt install curl -y
curl https://install.virtfusion.net/install-control-debian-13.sh | sh -s -- --verbose

# Ubuntu 22.04
apt install curl -y
curl https://install.virtfusion.net/install-control-ubuntu-22.04.sh | sh -s -- --verbose

# Ubuntu 24.04
apt install curl -y
curl https://install.virtfusion.net/install-control-ubuntu-24.04.sh | sh -s -- --verbose

# AlmaLinux / Rocky 8
dnf install curl -y
curl https://install.virtfusion.net/install-control-rhel-8.sh | sh -s -- --verbose

# AlmaLinux / Rocky 9
dnf install curl -y
curl https://install.virtfusion.net/install-control-rhel-9.sh | sh -s -- --verbose

# AlmaLinux / Rocky 10
dnf install curl -y
curl https://install.virtfusion.net/install-control-rhel-10.sh | sh -s -- --verbose
The script stops with a message when a control server is already installed. It looks for the file /opt/virtfusion/app/control/.env.
Make sure that the services run#
systemctl is-active vf-nginx vf-php8-fpm vf-control-wss mariadb redis-server
systemctl list-units --state=failed
The installation is correct when the first command gives active five times, and the second command gives no unit.
After the installation#
At the end the script shows two things on the screen:
- The address of the panel, with a self-signed SSL certificate
- A temporary administrator account and its password
Write this information in a safe place at once. If you lose the screen, you must reset the password:
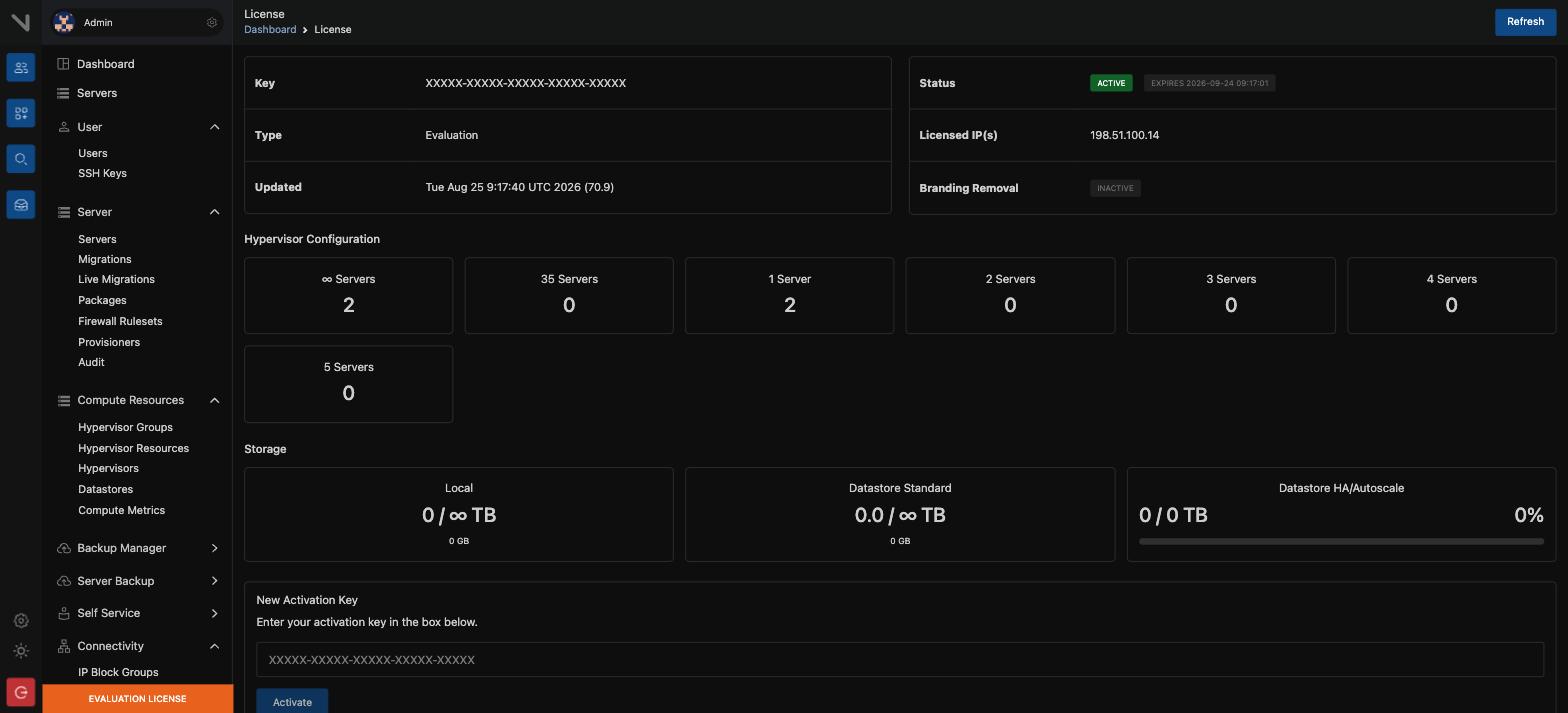
vfcli-ctrl user:reset-admin-passwordAt the first login you get two choices. You can make an evaluation licence for 30 days, or you can enter a licence key that you bought.
Lesson 3 — SSL, domains, and Cloudflare#
Bro, what is this? Ok so basically: the installer hands you a self-signed certificate and the browser will shout about it. There is no SSL page in the panel. VirtFusion just reads two files off the disk. Get a Let's Encrypt certificate with certbot, then add the deploy hook — skip the hook and your certificate quietly goes stale in 90 days.
Install your own certificate#
The installer gives a self-signed certificate with the name virt.fusion, and the browser shows a warning. In production, replace it.
VirtFusion 7 has no SSL page in the panel. It reads two files, and nginx gives the certificate from them:
/opt/virtfusion/ssl/ssl.crt     # the full chain
/opt/virtfusion/ssl/ssl.key     # the private key
Get a Let's Encrypt certificate#
The nginx of VirtFusion has an ACME directory ready on port 80. Use it with the webroot method. No change to the nginx configuration is necessary.
- Point the domain at the control server, and make sure that port 80 is
open.
- Install certbot.
- Get the certificate.
apt install certbot -y

certbot certonly --webroot \
  -w /opt/virtfusion/nginx/acme \
  -d panel.example.com \
  --agree-tos --register-unsafely-without-email --non-interactive
Copy the certificate at each renewal#
Certbot writes to /etc/letsencrypt/live/, but nginx reads /opt/virtfusion/ssl/. Without a deploy hook the panel keeps the old certificate after the first renewal, and the certificate expires.
cat > /etc/letsencrypt/renewal-hooks/deploy/virtfusion <<'EOF'
#!/bin/sh
set -e
D=/etc/letsencrypt/live/panel.example.com
install -m 0644 "$D/fullchain.pem" /opt/virtfusion/ssl/ssl.crt
install -m 0600 "$D/privkey.pem"   /opt/virtfusion/ssl/ssl.key
systemctl reload vf-nginx
EOF

chmod +x /etc/letsencrypt/renewal-hooks/deploy/virtfusion
/etc/letsencrypt/renewal-hooks/deploy/virtfusion
Then make sure that the renewal works:
certbot renew --dry-run
systemctl is-enabled certbot.timer
CAUTION: Do not put the control server behind the Cloudflare proxy (the orange cloud). The proxy stops the ACME test and the VNC websocket. Keep the DNS record in "DNS only" mode.
More than one domain#
The panel can run on more than one domain, for resellers as an example. A separate certificate is made for each one. In the VirtFusion documentation this is called "Multiple Control Server Domains".
Behind Cloudflare#
You can put the control server behind Cloudflare. Remember two things:
- To proxy the VNC WebSocket traffic, WebSocket support must be on in
Cloudflare.
- During ACME validation, turn the proxy off (the grey cloud). This causes
fewer problems.
CAUTION: Name the Host headers that the panel accepts. If you do not, cache poisoning and phishing links become possible. In VirtFusion this setting is called "Trusted Hosts". If you change the domain, change this setting too.
Lesson 4 — Install a hypervisor node#
Bro, what is this? Ok so basically: SSH into the bare metal and run one command. It pulls down KVM, libvirt, QEMU and the agent. Just make sure virtualization is actually turned on in the BIOS first. No VT-x or AMD-V means no KVM, and there is no way around that.
In plain words#
Connect to each bare-metal node with SSH and run one command.
( set -euo pipefail; \
  (command -v apt-get >/dev/null && apt-get update && apt-get install -y curl) || \
  (command -v dnf >/dev/null && dnf -y install curl); \
  curl -fsSL https://install.virtfusion.net/hypervisor-install.sh | bash )
The script installs KVM, libvirt, QEMU, the VirtFusion agent, and UFW.
Make sure of these before you install#
| Item | Why |
|---|---|
| Virtualization is on in the CPU (VT-x or AMD-V) | Without it KVM does not run |
/home is large, and it is ext4 | The VM disks go here |
| A static IP | The control server connects to this IP |
| The clock is in sync (NTP) | For the licence and for the logs |
The network mode#
You do not have to decide this during the installation. You can choose it later from the panel:
Direct (MacVTap), Bridged, Routed, NAT, Open vSwitch Bridged, and Isolated.
MacVTap is the default, and it usually needs no extra network setup. Phase 3 gives the detail.
Lesson 5 — Commission a hypervisor and set its limits#
Bro, what is this? Ok so basically: add the node in the panel, give it a name and an IP, press start, and the two machines shake hands. Then you tell the node its limits — how many VMs, how much vCPU and RAM it is allowed to hand out. That is where you decide your overcommit.
Step by step#
- In the panel, go to Admin → Hypervisors → Add Hypervisor.
- Give the name and the IP. IPv4 or IPv6 are both accepted.
- Press start. Commissioning begins, and the control server makes a
handshake with the node.
When the commission succeeds, set the resource limits of the node:
| Setting | What to enter |
|---|---|
| Servers | The maximum number of VMs. 0 means no limit |
| Virtual CPU Cores | The maximum vCPU. For overcommit, enter more than the physical count |
| Memory | The total RAM, less the part the hypervisor keeps for itself |
| Maximum Disk | The total space, less the part for templates and temporary files |
| Primary Network | The network type (MacVTap, bridge, and the others) |
Turn on each section, then press Update.
Hypervisor groups#
Go to Admin → Hypervisor Groups. A "Default" group exists after the installation.
- Name the group after the location, such as "Dhaka (DC1)" or "United Kingdom
(London)".
- Set the Server Distribution, which decides the node a new VM goes to.
The customer usually chooses a location. Your application or billing system sends the group id, and VirtFusion chooses the node.
CAUTION: Was the node attached to another control server before? Then a re-commission fails with the error "Commission status done". If the node is clean, delete
/opt/virtfusion/app/hypervisor/conf/auth.jsonand try again. If it is not clean, install the node again.
Lesson 6 — The task queue, the services, and updates#
Bro, what is this? Ok so basically: every slow job — builds, reboots, backups — goes onto a background queue. Move that queue to Redis, which the installer already put there. And keep the software current: control server first, then the hypervisors.
The task queue (Redis)#
All heavy work goes to a background queue: builds, reboots, and backups. By default the queue is in the database. On a busy system Redis is better, and the installer already installs Redis.
systemctl status redis

# /opt/virtfusion/app/control/.env
QUEUE_CONNECTION=redis        # or database

vfcli-ctrl app:restart --services=queue
Keep the software current#
VirtFusion changes quickly. An old version holds errors and security risks. Keep both the control server and every hypervisor current.
Before you update, look for server tasks that are still running. If a task is stuck, clear it first:
vfcli-ctrl task:cancel # cancels tasks that ran for more than 10 minutesLesson 7 — Security after the installation#
Bro, what is this? Ok so basically: your panel is now sitting on the open internet. Lock the admin area to your own IP and turn 2FA on, today. Add your own IP before you enable the restriction, or you will lock yourself out of your own panel.
In plain words#
The panel is open on the internet. Do this work on the first day.
1. Restrict the administrator panel to one IP#
vfcli-ctrl admin:ip-restrict enable
vfcli-ctrl admin:ip-restrict addip 203.0.113.10
vfcli-ctrl admin:ip-restrict list
vfcli-ctrl admin:ip-restrict delip 203.0.113.10
vfcli-ctrl admin:ip-restrict disable
WARNING: Add your own current IP first, then enable the restriction. In the other order you lock yourself out. You can then run
disableonly from the server console or over SSH.
2. Two-factor authentication (2FA)#
Turn 2FA on for every administrator account. In an emergency, this command turns it off:
vfcli-ctrl tfa-force-off3. Trusted Hosts#
Name the Host headers that the panel accepts. This stops cache poisoning and phishing.
4. Patch the host kernel#
Three KVM vulnerabilities became public in 2026: Januscape (CVE-2026-53359), Zapscape (CVE-2026-64561), and ITScape (CVE-2026-46316). The first two are on x86_64. The third is on arm64.
There is one correction: patch the host kernel and reboot. On x86, until the patch arrives, the interim measure is to keep nested virtualization off. On arm64 there is no alternative to the patch.
5. The rest#
| Task | Command or place |
|---|---|
| Turn the captcha off (only if you must) | vfcli-ctrl captcha-off |
| Reset the system credentials | vfcli-ctrl system:reset-access-credentials |
| Stop an accidental server delete | vfcli-ctrl server:dnd enable SERVER_ID |
| The QEMU sandbox | Keep it on. To turn it off is not advised |
At the end of phase 2 you can#
- Plan the correct OS and partitions
- Install the control server and a hypervisor
- Set up SSL and the domain
- Commission a node and set its resource limits
- Move the queue to Redis, and keep the software current
- Do the first-day security work